Thursday, June 5, 2014

New Roommates and Chicken Bombs!

Hey there! I hope everyone’s weekends were good! I’m trying to keep my promise and update more often! I had a great weekend, I got two new apartment mates! You guys, these girls are hysterical!
            I met Danielle on Saturday morning. I was doing a deep clean of my kitchen so when the new girls got there everything would look nice and clean. I was told that we had until noon to get everything ready before people showed up so it scared me when someone said hi to me Saturday morning. It scared me so bad you guys! I thought I was home alone, I went to bed with an empty house and never heard her come in. You know how first impressions are important? Well she got a great first impression of me. I was still in baggy shorts and a tank top with my wild morning hair. Yes, she saw me first thing in the morning. Great, right? I got to know her really well over the course of the day, she’s so sweet! Here’s the great thing, where is she from? Hawaii, yes I know! Well here she is!


Yes, she’s eating Spam & Eggs!
Then there’s Mary! Oh. My. Goodness. She is so funny! I haven’t known her as long (we just met on Sunday) but I have a feeling that we are so going to get along really well.
            Well, that’s all that been going on in my life lately. Here is one of my favorite recipes on the planet. No it’s not the healthiest, but it’s a treat. Here it is!

Chicken Bombs
Ingredients
5
boneless, skinless chicken breasts-makes 10 bombs:@)
5
jalapenos, sliced in half lengthwise and cleaned
20
slices bacon
4
oz. cream cheese, softened
1
C Colby jack or cheddar cheese, shredded
S&P to taste
1
C BBQ sauce-I used Sweet Baby Ray's

Directions
Slice chicken breasts in half (like a hamburger bun), place between wax paper and pound until its ¼” thick. Season with S&P.
Mix the two cheeses together and smear about 1 Tbsp. into each pepper half (just use up the cheese between all of the peppers).
Place the pepper on the chicken breast and wrap it up as best you can. I suggest placing the pepper cheese side down so it gets completely covered by the chicken.
              Wrap each chicken breast completely with two pieces of bacon. Start at one end, wrap half the breast and finish the second half with the other piece of bacon.
              Cook on a preheated 350 degree grill over indirect heat for 30 minutes or until chicken is done. Turn every 5 minutes and baste with BBQ sauce each time you turn it.
              For oven: Bake at 375 degrees for 30 minutes or until chicken is done. Baste a couple times and finish under the broiler to set the BBQ sauce. **I suggest a 400 degree oven and no BBQ sauce for the first 20 minutes, turning once to help cook the bacon. Then reduce heat to 375, change pans to lose some of the bacon fat (if you don’t have a broiler pan), cover in BBQ sauce and finish baking

Thanks so keyigredient.com for this awesome recipe!


Friday, May 30, 2014

Spring Is In The Air & The Sun Is Shining!

 Hello everyone! Sorry It’s been so long since I've posted. I've had some crazy stuff going on here at school. I’m really going to try and update more often, I promise! Hopefully this spring I’ll have some fun crafts to post about. I also have some new recipes to share! I've been pinning a lot of good looking spring and summer goodies to try.

I've been doing some really neat things in school with fundraising for an organization called the National Women’s Coalition Against Violence & Exploitation (NWCAVE). They deal with women and children that are in abusive and sexually exploitative situations. Did you know that the greater Portland area is the highest trafficked place in the U.S.?! I live in the Pacific North West! This hits so close to home everyone, it’s so tragic! The I-5 corridor is so easy to grab girls on and get them out of the country because you can get from Canada to Mexico in almost no time. NWCAVE is really helping bring awareness to this issue, and I have to applaud them. It truly is an issue that no one wants to talk about. So please, if you have a daughter that is around the ages that are most exploited (12-22) please talk to them about it!

Okay on to a bit happier subject, I have another recipe! Due to the fact that the sun is shining and you always need something iced in your hand to be content, I present to you… drum roll please. Thai Iced Tea! This is one of my favorite things on this planet to drink. I LOVE Thai food with everything in me! I think I was three when my auntie took me out to Thai food for the first time, and I have loved it since. So please enjoy this recipe like I have!


Thai Iced Tea Recipe  
Yield: Serves 4-6
Total Time: 1 hour
Please read the post about this Thai tea recipe. It discusses the brands and different methods on how to make it to get the orange color, as well as photographs to illustrate the process. When we made our Thai Tea mix from the Pantai Thai Tea Mix bag, we reduced their suggested sugar amount by about 20% to our own personal taste.
Ingredients:
Thai Tea Mix Ingredients:
·         1 cup (80g) Pantai Thai Tea Mix or 4 Black Tea bags
·         4 cups (950ml) Water
·         3/4 cup (150g) Sugar
Thai Tea Assembly:
·         Pre-made Thai tea mix (see above)
·         half and half (some folks also use coconut milk, whole milk, sweetened condensed milk)
·         ice
Directions:
Thai Tea Mix directions
1.      Bring water to boil and add the Thai tea mix or the 4 black tea bags. Add sugar and gently stir to completely dissolve sugar. Gently boil tea for about 3 minutes. Remove from heat.
2.      Allow tea to steep for at least 30 minutes and allow it to cool. The more concentrated the tea flavor, the better the Thai tea tastes.
3.      If you are using the Thai tea mix, strain the tea leaves. Set finished Thai tea aside to cool.
4.      If you are using black tea bags, remove the tea bags and set aside finished Thai tea to cool.
5.      You can make this ahead of time and have the Thai tea chilling in the fridge.
Assembly directions
1.      Fill glasses with ice.
2.      Fill glass with about 3/4 full of the Thai tea mix. Then top off remainder of glass with half and half.
3.      Stir and enjoy.
Thanks  to whiteonrecicouple.com for this amazing recipe!

Let me know what you think!
Comment! Comment! Comment!
Love,
Kate

Friday, April 4, 2014

Long Time No See!

Hey everyone, Long time no see! Sorry I have been gone so long! Life and school got exceptionally busy! The two roommates that I made great friends with graduated their program and moved out. It was really sad to say the least. I am so proud of them, though I didn’t get to see them graduate I did get to see them before!
 Well I have only done a few fun things lately. I got to go to Seattle for the weekend with my mom two of my aunts and a couple of cousins. It was SO MUCH FUN! I am convinced that I will someday live in Seattle, but only the downtown area. We shopped, and made the most amazing salad (we bought everything fresh from Pikes Place), and ate at the BEST Greek restaurant ever! Right now I am preparing to host a table at my churches women’s tea. I almost didn’t do one, but last minute I decided that I wanted to. I have decided on a Kate Spade theme. Fitting right?! I am so in love with Kate Spade’s style. So as I am prepping for that, and doing school work, and trying to have a life, I haven’t been able to try as many new recipes as I like. I do have one for you though! On the last weekend that Autumn and Nicole lived with me we made the best cheater Donut recipe! Here you go!

Refrigerator Biscuit Donuts
Makes 10 Small Donuts.

Ingredients:
·        1 can home-style or buttermilk biscuits (the cheaper the better)
·        1 ½ inches canola oil in a high -rimmed frying pan
·        ½ cup white sugar
·        1 tsp cinnamon
Directions:
·        Line plate with paper towels
·        Put cinnamon sugar in large paper bag or mix in a pie plate
·        Heat oil to a good frying temp… 375? I never check the temp with a thermometer. Just get it pretty hot over medium heat.
·        While oil heats, open biscuits. Take each one and with your fingers, stretch a large hole in the center. When oil is hot, fry about 3 at a time, turning after the bottom is a deep golden brown. Fry on the second side until the whole thing is deep golden brown.
·        Remove each one with tongs and toss in cinnamon sugar
·        Use another pair of tongs or a fork to move them to the paper towel lined plate
·        Continue frying until they’re all fried. Remember to turn the heat off when you’re done.

Let me know what you think!
Comment!

Love, Kate

Friday, February 14, 2014

Snowed in weekend and Valentine’s Day


Happy Valentine’s Day everyone! I hope, whether or not you have a loved one, you are enjoying this day of love. I know I am, I just got a perfect score on a test! It has been one crazy week. First, last weekend we got a crazy snow storm where I live. Within 24 hours, we had accumulated three or so inches… I know that sounds like nothing, but for almost sea level… well it’s a big deal. I don’t have a car that drives in snow well, so I was stuck at home all weekend. The roads down here were a mess! Ugh, can I just say how much I don’t like snow? It’s just too cold and gross! Though one of the fun things about the snow was the crazy snow ball fight that two buildings got in to. It was amazing you guys! Once my roommates used all of the snow on our deck I helped one of the girls take all of the bowls and a bucket to get more snow! It was amazing to watch. During the crazy snow storm, we didn’t know what to do so, like any college student, we walked to the nearest Redbox. We rented two movies a day! It was great just hanging with the girls all weekend and staying in my yoga’s all weekend!
Well, I made it through my first crazy apartment moment. My toilet overflowed! I couldn’t believe it! There was a clog when I got home, so doing what I have done before, I flushed it. Well that made it overflow! I had one of my roommates come and help me, and we made a dam to stop the flow of water. It took a call to my dad to turn off the water so we could start cleaning up the mess it made! I told the girls that if we could make it through that we could make it through anything!
Well enough of crazy stuff, and on to the recipe! I absolutely love this salad!
Strawberry, Goat Cheese and Quinoa Salad
1 cup of quinoa, cooked
1 cup Strawberries, hulled and chopped
3 oz goat cheese, crumbled
½ cup chopped arugula
1 tbs basil, chopped
¼ cup balsamic vinegar
1/8 tsp salt
2 tbs red onions, minced
2 tbs honey
In a bowl add the quinoa, strawberries, goat cheese, basil, arugula and toss combine.  In a separate bowl, whisk together the balsamic vinegar, salt, onions and honey. Drizzle the balsamic mixture over the quinoa/strawberry mixture and toss to coat. Serve immediately.
(Makes 2 large salads, or 4 small side dish salads.)

                Let me know what you think!
Comment!
Love,

Kate 

Thursday, February 6, 2014

A Weekend Spent at Home & Teriyaki Chicken

Hey Everyone! Hope everything has been going well for y’all. I know were in the middle of the week, but I am still thinking about last weekend. I got to go home and just hang with my family. Can I just say how amazing it was? Oh goodness you guys, it just made my week. I also just can’t get over how cute my dog was this weekend. I didn’t realize how much he missed me! Just to show you how adorable he is, he followed me around all weekend and would just lay right be me. He even tried to distract me from my packing with his cuteness!
Not only did I get to spend awesome time with my family, I got to spend time with my friends. It was awesome to go out after church on Saturday and get to spend quality time eating and chatting with amazing people!
Now, onto bigger things… THE SEAHAWKS WON THE SUPER BOWL! Can you believe it?! Oh my goodness I was so excited! I’m not the girl that is really into football, actually I don’t even like sports. I usually sit and give myself a manicure and read a magazine during the Super Bowl. Although I didn’t get to watch it this year- due to the fact that I was driving back to school- I was constantly calling my mom to check the score. It was amazing, we killed the Broncos! It was a great start to my week.
So, on to school. I don’t think that I have told y’all about school yet. You guys I absolutely love it here! I could not have chosen a better school to come to! I never liked high school and always had a hard time going on a daily basis, but I love getting up in the morning go come to class! Not only has my attendance improved here, but my grades have too. You are looking at- not really- a 4.0 student! I know, my mom is proud.
Any who, I think it’s time for a new recipe! I made this chicken on Monday and it was FANTASTIC! I have been eating it on salad, but you could put it over rice, quinoa, or even noodles!


Crock Pot Teriyaki Chicken


Ingredients:

  • 2 1/2 lbs boneless skinless chicken breasts, and cut into 2-inch pieces
  • 1/2 cup soy sauce
  • 1/2 cup honey
  • 3 garlic cloves, whole
  • hot chili sauce (optional)

Instructions:

  1. Add chicken to crock pot along with soy sauce, honey, garlic cloves and hot sauce.
  2. Set crock pot to low and cover.
  3. Stir once 2 hours into cooking and then cook addition 2 hours.
  4. Remove garlic cloves.

Let me know what you think!
Comment!
Love,

Kate

Thursday, January 30, 2014

More Crock pot Recipe’s


Just like it says, more crockpot recipes! I have felt really accomplished lately, this is the third and fourth new Pinterest recipes that I have made since I moved. Don’t worry though, I’ll share all the others that I’ve made in the past too, nine more! On Monday I made one amazing tuna noodle casserole. Can I say YUM?! The only thing I would change is sautéing the onions before, they didn’t cook down far enough for my liking. Then last night I made some super awesome cinnamon apples. Oh my goodness you guys, those apples! I put them over some vanilla ice cream, and instant heaven. My roommates love that I cook all the time. Since I don’t eat wheat and there are SO many recipes that aren’t gluten free that look like fun to make, I asked my roommates if they would be my guinea pigs. Of course they said yes, so I will be making some really amazing recipes soon! Any ways, here are the recipes.
Crock Pot Tuna Noodle Casserole
Ingredients:
4 cups egg noodles
1 10 ¾ ounce can condensed cream of mushroom soup
1/4 cup water
1/3 cup onion, finely chopped (I only had frozen chopped onions and sautéed  them first)
2 cans drained tuna 1/2 cup sour cream
Directions:
 1. Cook noodles according to package and drain.
 2. Spray crock pot with cooking spray. Pour in cream of mushroom soup and water. Mix together.
3. In a bowl, mix noodles, tuna, and onion (save the sour cream for later).
4. Pour into crock pot and stir.
5. Cook on high 1.5-2 hours.
 6. During last half hour add in sour cream and mix well. 

*remember to sauté the onions before adding to the crockpot.


Crock-Pot Cinnamon Apples


Ingredients

1/4 cup brown sugar
1/4 cup walnuts, chopped
2 Tbsp margarine or butter
1 tsp cinnamon
6 Gala or Macintosh apples, cored, peeled and sliced
1/2 cup apple juice

Ice Cream {optional}

Instructions
In your crockpot mix brown sugar, walnuts, margarine or butter, cinnamon, and apple juice together {be sure to use a utensil that won't scratch your crockpot}
Peel, and slice your apples
Place apple slices in crockpot and stir together with apple juice mixture
Set crock-pot to cook on high for 1 hour, or until apples are soft
·         I would suggest that you cook the apples for 2-3 hours, depending on how soft you want your apples.


Enjoy the recipes, let me know what you think!
Comment!
Love,

Kate

Monday, January 27, 2014

Monday Mornings and Ocean Trips

Hey everyone! I hope everyone’s weekends were amazing, mine was. I got to celebrate my best friends 21st birthday at a hotel on a beach, and we had amazing weather! We got to just hang out and chat. We rented scooters and she conquered her fear of riding one, I’m so proud. We ate at the best pizza place ever, and got to sleep in, well kind of. Here are some pictures from our trip.


It was a great trip, and it was nice to get away and have fun! Did anyone do anything super fun this last weekend?
Comment!

Love,
Kate

Tuesday, January 21, 2014

Birthdays and Wishing for summer!

             Hey Y’all! Hope everything is going good. I don’t have too much to talk about today. I got to go home! Oh my gosh your guys. It was so nice! I was able to visit with both of my grandmas.  I got to go out to dinner and enjoy a comedy show with a good friend, and spend time with my family. It was a bit of a packed weekend. I got home and went out to dinner with my dad, visited with one of my grandmas and got to hang with my best friend. Then went onto a crazy Saturday helping with my church’s middle school camp check in, and many other fun things. Sunday though, was amazing. I got to see so many people that I have missed terribly. One of my friends made me a care package that included no bake cookies, gluten free pasta, homemade marinara sauce, popcorn, and more!  I just want to thank everyone that made my weekend!
           OK, on to some important stuff. Today everyone, my BEST friend turns 21! I don’t know if I have told you guys about her yet. Tiffany is one of the best people I have ever met. She is so kind, and sweet it’s kind of weird ;) I love to tell the story of how we met. It was actually at a winter camp that our church had for middle school students that we both attended. We were in the same cabin but didn’t interact much. That was until I decided to do a polar bear swim – I know, stupid. Once I was done my leader asked Tiffany to walk me back to our cabin and make sure I got into a hot shower right away… my lips were starting to turn blue. The whole way back she talked to me. I thought she was so wired, I wondered why and even how someone could be so friendly to someone they had really just met. Well that was the start of our friendship. I am so blessed to have her as a friend. She is always there to say something positive in the midst of anger or sadness, and to comfort me when I need it. We tend to communicate through sending pins back and forth, and through new girl quotes. I know it seems weird but it fits us. She loves cats WAY too much, but that’s what’s fun about her. So in honor of Tiffany here is one of her favorite cat pictures, courtesy of Pinterest.


         So because I have had summer on my mind lately I thought I would share one of my favorite summer money saving drinks!
                                              DIY light Frappuccino recipe
Enjoy a homemade version of Starbucks Light Frappuccino from the convenience of your own kitchen. Each low calorie frozen blended cappuccino has just 2 Points + per serving, making it an ideal frozen coffee fix for Weight Watchers Members.
Ingredients
§  2 Tbsp instant coffee granules (regular or decaf)
§  2 Tbsp fat free vanilla flavored coffee creamer, powdered
§  1/2 cup fat free milk
§  8-10 ice cubes
Instructions
1.    Blend all ingredients together in a blender and process until smooth. If desired, sweeten with Splenda.

PER SERVING: 95 calories; 0 g fat; 17 g carbohydrates; 4 g protein; 0 g fiber
*I used the Starbucks Iced Caramel Via as well as other instant coffees.
Let me know what you think!
Comment!
Love,                                                                                             
Kate


Wednesday, January 15, 2014

Hot Corn Dip, Studying, and Tests.

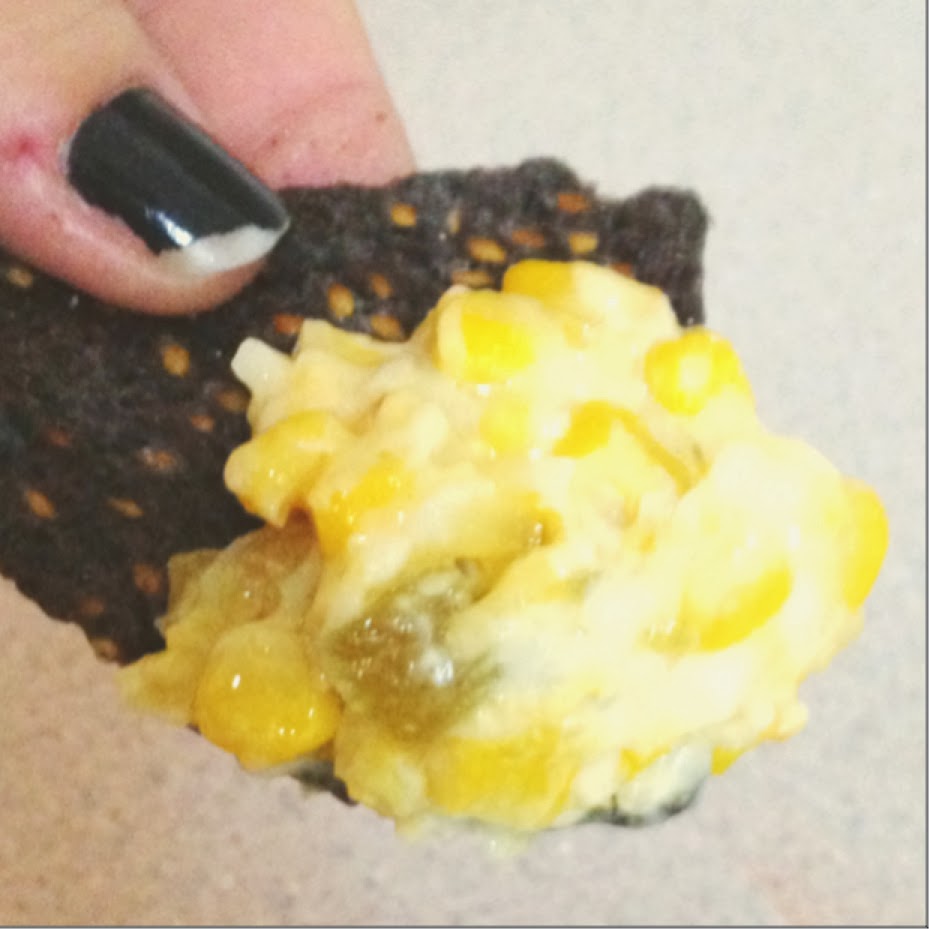
Hey everyone! These last couple of days have been great! The title says it all, I've been up to nothing but studying, and making hot corn dip. You have to have good study food right? Well I found this recipe on Pinterest and decided I had to make it. Oh my goodness you guys, it was phenomenal! My housemates thought so too! It’s super easy to make and really cheap! Here’s the recipe!
Hot Corn Dip

Ingredients:                               
(2) 11 oz. cans MexiCorn, drained
(2) 4.5 oz cans Green Chiles, drained
2 cups (about 8 oz.) Monterrey Jack cheese, shredded
3/4 cups Parmesan cheese, shredded
1 cup Mayonnaise
Fritos Scoops for dipping


Directions:
Preheat oven to 350 degrees and grease 13x9 casserole dish. Combine MexiCorn, Green Chiles, cheese & mayo in a large mixing bowl. Spread evenly in a casserole dish and bake uncovered for 30 - 40 minutes, or until hot and bubbly around the edges. Serve warm out of the oven with Fritos Scoops.


Let me tell you guys, I didn’t want to go and buy more chips. I already had some blue corn tortilla chips as well as some of my favorites -Juanita’s- and they were super good! I do have to say though, one of the best study foods ever.
                On to the test aspect of my title, I had my very first test of the program to study for. Yay, fun! Well, I don’t really know if fun is the right word to describe studying, but oh well. I think I did OK on my test. I studied pretty hard and felt confident while taking it. I did all of the things that are good for you while you study. I listened to classical music, and didn’t study for long intervals. Are there any other good study techniques that you know or have helped you?!
Comment!
Love,
Kate


Monday, January 13, 2014

Brownies and Face Time!


Hey, I hope everyone’s weekend was great! I know mine was! Due to the fact that I left my clothes at home my mom was an angel and brought them to me. Not only did she bring me my clothes, but she also brought me extra food, and things I forgot to bring! This is how amazing my family is everyone, my aunt even came with her and we made a weekend out of it! It was really nice to see my mom and just be able to relax and not HAVE to do anything this weekend. We got go shop, have dinner, get some amazing chocolate, and relax. I mean, how much better can it get?! All in all my weekend was amazing!
                Yesterday I made some amazing brownies! And here is the better part, they’re GLUTEN FREE! I found out that I was allergic to wheat a couple of years ago and my mom went on the hunt for good gluten free recipes. So I am making these brownies and I ask my roommates if the oven works- I have to ask because I found out the hard way that our dishwasher didn’t work- and found out that it bakes weird. So after 40 or so minutes I was too impatient and took them out of oven. When I poked a knife into it, it came out clean so I thought it was done! Well they were really gooey in the middle, but let me tell you, they were amazing! Once I figure out how to make them in this new oven well I will give you the picture, but for now here is the recipe!
Gluten-Free Dark Chocolate Brownie Recipe
Ingredients:

5 ounces high quality 60-70% cocoa dark chocolate
1/2 cup organic coconut oilhttp://www.assoc-amazon.com/e/ir?t=recipfromaglu-20&l=as2&o=1&a=B001EO5Q64&camp=217145&creative=399369
1 cup light brown sugar (not packed)
1/2 cup almond meal
1/4 cup sorghum flour
1/2 teaspoon fine sea salt
1/4 teaspoon baking soda
2 organic free-range eggs, beaten
1 tablespoon bourbon vanilla*

Optional:

1/2 cup chopped pecans or walnuts, if desired
Dark chocolate chips for the top, if desired

Instructions:

Preheat the oven to 350ºF. Line an 8x8-inch square baking pan with parchment paper.

Melt the dark chocolate and coconut oil in a saucepan over low heat, gently stirring.


(Or melt in a microwave safe measuring cup and stir together to combine.)


In a mixing bowl whisk together the brown sugar, almond meal, sorghum flour, fine sea salt and baking soda. Make a well in the center and add the beaten eggs, vanilla extract and melted dark chocolate mixture. Beat on low-medium for two minutes, until the batter begins to come together. At first it will seem thin, like cake batter, but keep beating until it thickens and becomes smooth and glossy.

If you are adding nuts, stir in the nuts by hand and spread the batter into the prepared baking pan. Even out the batter with a silicone spatula.

Stud the top with some dark chocolate chips and press in slightly.

Bake in the center of a preheated 350ºF oven for 32 to 35 minutes, or until the brownies are set. The top will crack, like a flourless chocolate cake.


Cool on a wire rack; and remove the cooled brownies from the pan by gripping the foil edges and lifting the brownies out as a whole.


Chill for an hour before cutting. (Though warm and gooey is really divine, if you don't mind them falling apart.)

Yield: 16 servings

*For chocolate-mint brownies use 1 teaspoon peppermint extract and 1 teaspoon vanilla extract.
               
                Props to my mom for finding the recipe!
I have had the best week, aside from the getting settled in and semi missing my own bed at home, I had a really good week! Here are a few pictures from my week!
The way I do homework

Getting to face time with my best friend and getting to say hi to her amazing grandma (she’s a little sassy)


Well I think that’s all, please comment if you bake the brownies and let me know what you think! Don’t be shy about commenting! Remember, you don’t have to be signed up to blogger to comment!
Comment, comment!
Love,

Kate.


Friday, January 10, 2014

Just me and my Netflix!

Hey everyone!
Sorry it’s been a couple of days since my last post. I started my official classes on Wednesday. Monday and Tuesday were orientation days and getting to know you/ going over the rules. After school I have been going home and doing my homework, but when I get done with my homework all I have been doing is watching Netflix. Wow I feel so lazy lately! My house mates are really cool though, we all just mind our own business and do our own thing. I don’t really know what to say now… I haven’t cooked anything new this week, or done anything really exciting.
                Does anyone have good advice for a college student? Any good stories of things to avoid? Comment! Comment! Tell me!
                Things you can look forward to for next week are NEW RECIPIES! I’m sure to do something silly or have a really great quote form someone. Well, until next time!
Comment!
Love,

Kate